Woodturning is an age-old craft that combines skill, creativity, and precision to transform raw wood into functional and decorative objects. Whether you want to create elegant table legs, artistic bowls, or finely detailed spindles, a lathe is an essential tool for shaping wood with speed and accuracy. If you’re new to woodturning, Angelo Dellomo will walk you through the basics—from understanding the lathe and its components to practicing essential techniques that will set you on the path to mastering this rewarding craft.
Understanding the Wood Lathe
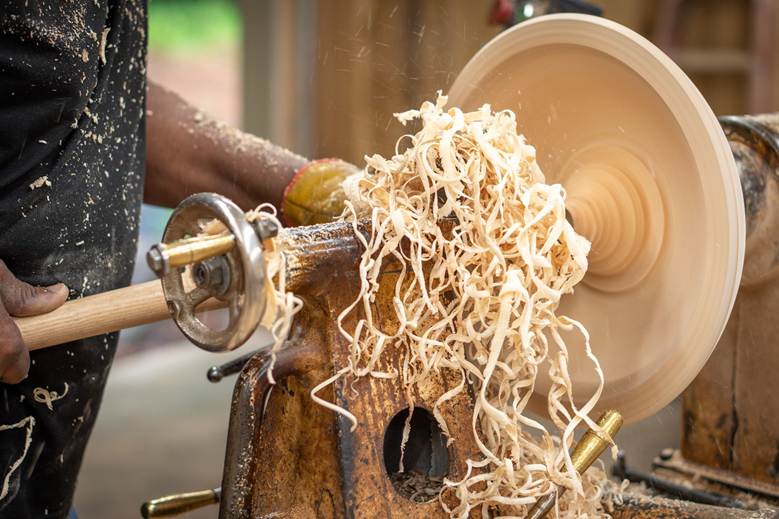
A wood lathe is a power tool that rotates a piece of wood at high speed, allowing the user to shape it using hand-held chisels and gouges. Unlike other woodworking machines that cut or carve in a linear fashion, a lathe allows for symmetrical, rounded, and curved designs by rotating the workpiece around a fixed axis.
Key Components of a Lathe
- Headstock – Houses the motor and spindle, which drive the rotation of the workpiece.
- Tailstock – Positioned opposite the headstock, it provides support for longer pieces and can hold accessories like drill bits.
- Tool Rest – A horizontal support where chisels and gouges rest while shaping the wood.
- Bed – The sturdy base of the lathe, keeping all components aligned.
- Motor & Speed Control – Allows you to adjust the rotational speed depending on the type of wood and project.
Choosing the Right Wood for Turning
Selecting the right type of wood is crucial to achieving clean, smooth results. Some woods are easier to work with than others, making them ideal for beginners.
- Softwoods (e.g., pine, cedar, fir) – Generally easier to turn but can tear out or chip if tools aren’t sharp.
- Hardwoods (e.g., maple, oak, cherry, walnut) – Offer better detail and durability but require sharp tools and steady control.
- Exotic Woods (e.g., ebony, rosewood, purpleheart) – Often used for decorative pieces but can be expensive and more challenging to work with.
For beginners, maple, cherry, and walnut are excellent choices due to their balance of hardness and workability.
Essential Woodturning Tools
While the lathe itself is the main piece of equipment, you’ll need a variety of cutting tools to shape and refine your workpiece. Here are the must-have woodturning tools:
- Roughing Gouge – Used for shaping raw, square wood into a round form.
- Spindle Gouge – Ideal for creating curves, beads, and fine details on spindle work.
- Bowl Gouge – A deeper-fluted tool for hollowing out bowls and vessels.
- Parting Tool – A narrow tool for cutting grooves and separating the finished piece from the lathe.
- Skew Chisel – A sharp, flat tool used for smooth cuts and refined finishes.
- Scrapers – Used for fine finishing cuts, especially on bowls.
Setting Up Your Lathe for Safety and Precision
Before starting your project, it’s essential to set up your lathe correctly and follow safety precautions.
1. Secure the Workpiece
Attach the wood securely to the lathe using either a faceplate, chuck, or between the centers (headstock and tailstock). Loose workpieces can be hazardous.
2. Adjust the Speed
- Low speeds (500-1000 RPM) for roughing out and large workpieces.
- Medium speeds (1000-2000 RPM) for shaping and detailing.
- High speeds (2000+ RPM) for finishing cuts on small projects.
3. Position the Tool Rest
Set the tool rest close to the wood (about 1/8 inch away) and slightly below the centerline to provide good control and leverage.
4. Wear Proper Safety Gear
- Face shield or safety glasses – Protects against flying wood chips.
- Dust mask – Prevents inhaling fine wood particles.
- Hearing protection – Recommended for prolonged use.
Basic Woodturning Techniques
1. Roughing Out
Start with a roughing gouge to turn square or irregular wood into a smooth, cylindrical shape. Hold the tool firmly and move it along the tool rest while applying gentle pressure.
2. Shaping the Wood
Once the workpiece is round, switch to a spindle gouge or bowl gouge to create curves, beads, or coves. Use smooth, controlled strokes to guide the tool along the surface.
3. Hollowing Bowls and Vessels
For bowl turning, mount the wood on a faceplate or chuck. Use a bowl gouge to gradually remove the inside material, making even passes from the center outward.
4. Cutting Grooves and Parting Off
Use a parting tool to create decorative grooves or to separate the finished piece from the lathe. Cut carefully and support the workpiece to avoid splintering.
5. Sanding and Finishing
Once shaping is complete, sand the piece directly on the lathe while it’s spinning. Start with coarse grit (80-120) and progress to fine grit (400-600) for a smooth finish. Apply a wood finish like Danish oil, lacquer, or beeswax for durability and a polished appearance.
Beginner-Friendly Projects to Try
If you’re just getting started, practice with simple projects to build confidence and refine your skills:
- Spindles and dowels – Great for learning basic shaping techniques.
- Wooden pens – A fun project that introduces precision work.
- Bowls – A staple of woodturning that enhances hollowing techniques.
- Candle holders – Combines shaping and groove-cutting skills.
- Tool handles – Functional and customizable practice pieces.
Common Mistakes and How to Avoid Them
- Dull Tools – Keep tools sharp to prevent tear-out and rough finishes.
- Improper Speed – Adjust speed based on workpiece size and tool being used.
- Poor Tool Control – Let the tool rest on the tool rest and move smoothly.
- Rushing the Process – Work methodically to prevent mistakes and accidents.
- Skipping Safety Measures – Always wear protective gear and secure the wood properly.
Woodturning is a highly rewarding craft that offers both artistic and functional possibilities. With patience, practice, and the right techniques, beginners can quickly develop the skills needed to create beautiful wooden objects. By mastering the basics of lathe operation, tool handling, and finishing, you’ll be well on your way to producing stunning, handcrafted pieces that showcase your craftsmanship and creativity.
So, set up your lathe, grab your chisels, and start turning!